
This is long overdue to be written and documented here. I’ve played around with Nomad for quite some time but haven’t had the time to write about it.
Nomad is a workload orchestration platform born out of HashiCorp. Workload as a choice of word is intended as Nomad is capable to also orchestrate non-containerized workloads, such as Java, raw_exec, etc. In Nomad’s term, this is called ‘task driver’ (you can refer to the list of driver here. Nomad is a single binary installation and can be configured as a client or server. To read further, HashiCorp did a great job documenting the architecture overview here.
Like many other X-as-a-code tools, Nomad is based out of desired state specified within the Job. Job Specifications are declared in a file called Nomad job file in which group and tasks are written. Example of a job file below:
job "consul" {
  datacenters = ["dc1"]
  group "consul" {
    count = 1
    task "consul" {
      driver = "raw_exec"

      config {
        command = "consul"
        args    = ["agent", "-dev", "-client=0.0.0.0"]
      }
      artifact {
        source = "https://releases.hashicorp.com/consul/1.7.2/consul_1.7.2_linux_amd64.zip"
      }
    }
  }
}
The ‘group’ is nothing more than a collection containing series of tasks expected to be placed in the same Nomad client in a cluster setup. Whereas ‘task’ is the actual unit of work that will run the workload as per specification. Referring to the job file above, means you are expecting a single job that will run Consul (another HashiCorp’s great product) downloaded from the listed URL in one client with the specified command. Once you submitted, Nomad has no choice other than allocating the job to one of the available clients.
Okay, the WordPress part, please!
No other reason for me to choose WordPress except that I am aware of the platform, I don’t have to code, and it’s readily available in Docker Image.
Please note that for this setup, I am only using my 9 years old MBP that would act as client and server. Please don’t follow the setup for any production workload.
Intention: I am expecting to have a WordPress site running with one MySQL instance and 2 WordPress instances load-balanced using Fabio.
Here we will need to declare one job to run wordpress, one to run mysql, one to run Fabio, and one to run consul. The reason why to use Consul is to be able to have Service Discovery available in place so services can communicate using Consul DNS (more about this later).
 Job Files:
 consul.nomad
 mysql.nomad
 wordpress.nomad
 fabio.nomad
Before being able to run all these nomad jobs, be sure to download the approriate Nomad binary file and Docker runtime for your environment. Also, nomad configuration need to placed somewhere for binary to refer to when executing the nomad cmd. Placing in the same dir as nomad jobs would work too. If you are also using Mac, this configuration should work fine.
data_dir  = "/Users/asadshamlan/nomad/data"

bind_addr = "0.0.0.0" # the default

server {
  enabled          = true
  bootstrap_expect = 1
}

client {
  enabled = true
  options = {
    "driver.blacklist" = "java"
  }
  host_volume "mysql" {
    path      = "/Users/asadshamlan/nomad/mysql-nomad/data"
    read_only = false
  }
  host_volume "wordpress" {
    path      = "/Users/asadshamlan/nomad/wordpress-nomad/data"
    read_only = false
  }
}

plugin "raw_exec" {
  config {
    enabled = true
  }
}
The above configuration is to tell nomad the following:
- Where the nomad data directory is set (store state etc.)
- What’s bind address (en0).
- Enable server mode
- Enable client mode
- Enable Stateful Workflow using host-volumes
- Enable raw_exec driver to run non-containerized consul
As host volumes are enabled, be sure to create the directories as how you specified in each host volume block. Once the binary is installed and config is available, run the command to start nomad with config args to refer to.
nomad agent -config=nomad-config.hcl
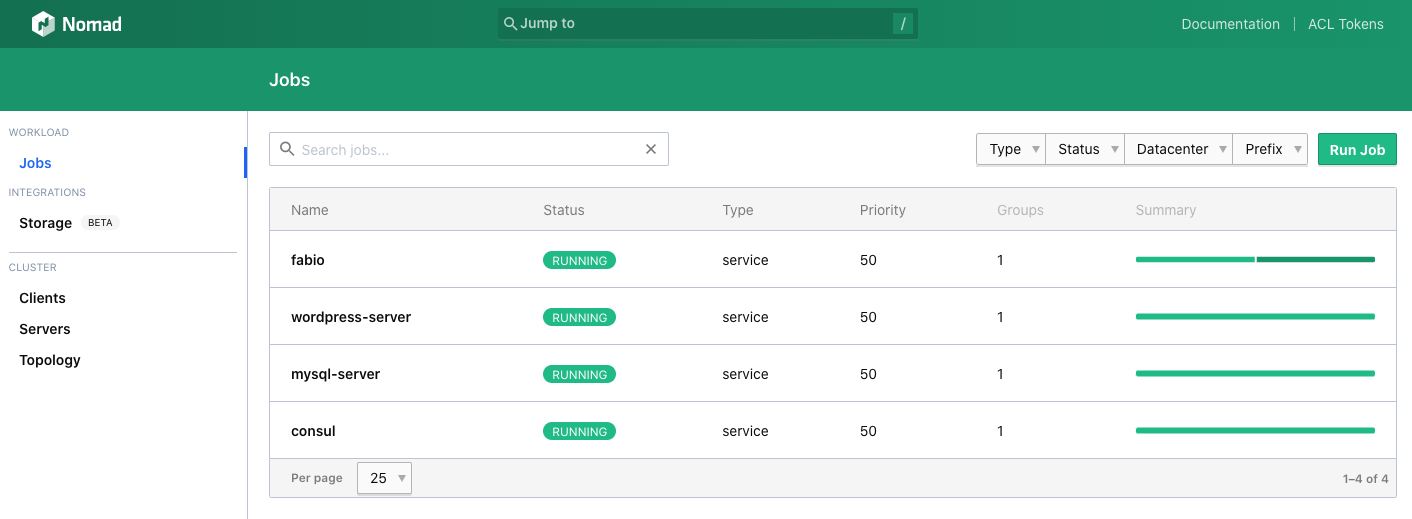
If you encounter host volume path-related error while executing the command, check if it is related to folder permission. Otherwise, you should be good to navigate to http://localhost:4646/ui/jobs.
At this point, nomad should be running and ready to take up the jobs. As stated above, you will need to submit four different jobs (Consul, MySQL, WordPress, and Fabio). Lets start with the first job and then repeat the steps for the remaining jobs.
- From the UI, navigate to this URL: http://localhost:4646/ui/jobs/run
- Fill in Job Definitions with nomad job file (listed below)
- Click Plan to review
- Click Run to let Nomad schedule the job
- Repeat the steps for each job.
Check and verify if all the jobs are successfully allocated and running properly. All with the green running status as shown below:
You can then try to navigate to http://fabio.service.consul:9999/wp-admin/ so you can start setting up your WordPress. You’re good to go!
A little bit on the Consul DNS part. As each job is automatically registered to Consul, you can resolve the
 FastAPI Background Task: The How To!